Evalm
Arduino DIY Smart Solar Tracking Equipment Kit
Arduino DIY Smart Solar Tracking Equipment Kit
![]() Estimated Delivery: -
Estimated Delivery: -
Couldn't load pickup availability


Description:
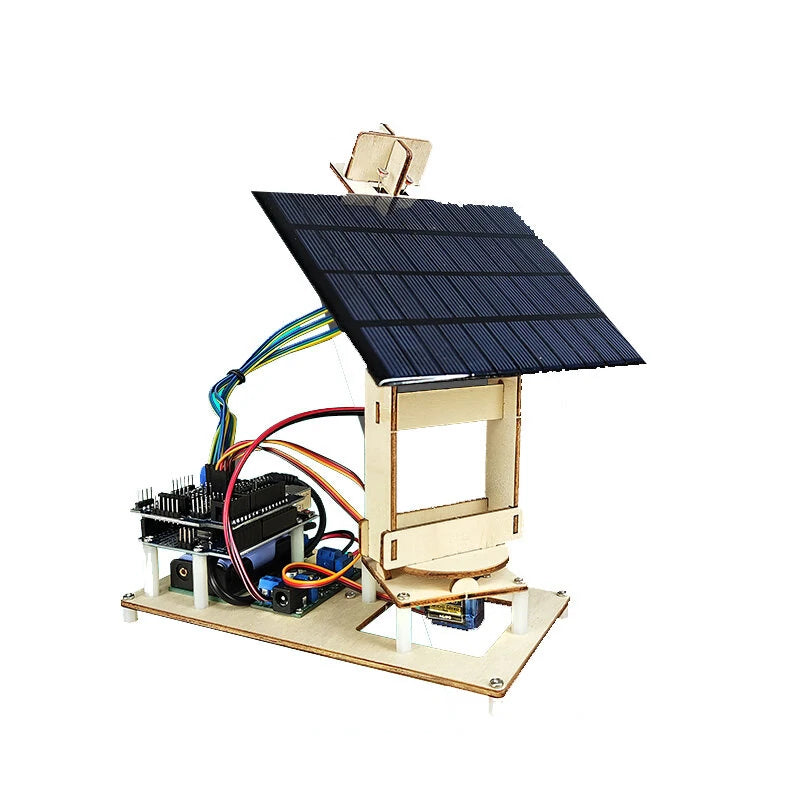
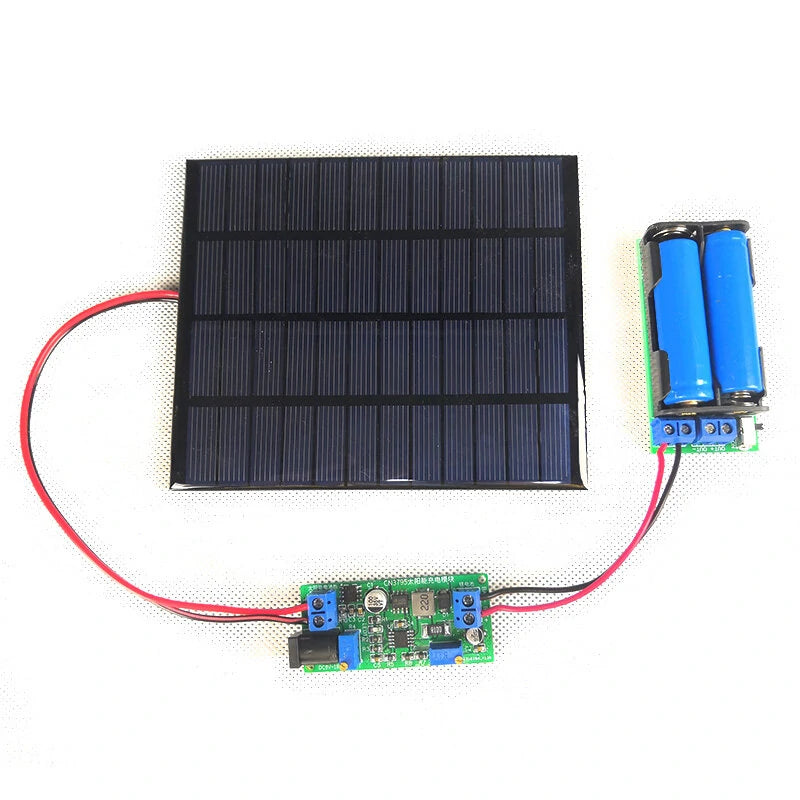
This Solar Tracker Kit includes solar panels, solar charging modules, photosensitive modules, and control modules. The light sensing module calculates the position of the light and adjusts the steering gear to optimize the solar panel's orientation. This ensures maximum power output through solar charging. You can charge the lithium battery using the solar panel or a DC9-24V power adapter. Additionally, a USB 5V power supply can input power to the system. The project supports module blocking and stitching for hands-on learning. With open-source programming procedures, you can understand module functionality and enhance programming skills.
Features:
Product Name: Solar Tracker Kit
Power Input: Double-section lithium battery supply, USB power supply
Solar Panel: 12V 1.92W
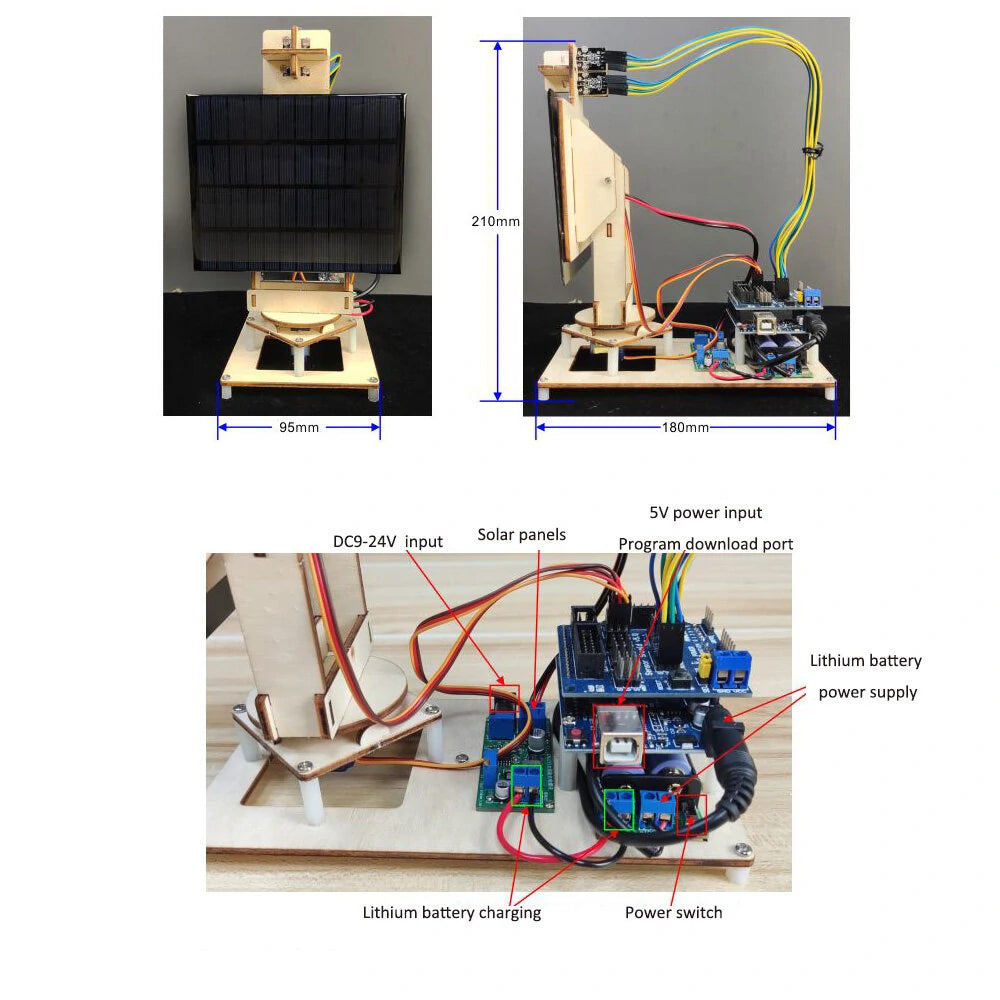
Dimensions: 95 x 180 x 210 mm
Weight: 285 g
Package Includes:
- (Note: Battery not included)
- UNOR3 Development Board x 1
- UNOR3 Expansion Board x 1
- Solar Droplet 12V/1.92W x 1
- Double-sided Adhesive 10CM x 1
- KY-018 Photosensitive Resistance Module x 1
- SG90 Steering Gear x 2
- Two Female DuPont Line 3P x 4
- USB Data Cable x 1
- Solar Tracker Bracket x 1
- Hexagon Nylon Pillar M3*8 x 5
- Hexagon Nylon Pillar M3*18 x 4
- Hexagon Nylon Pillar M3*22 x 4
- M3*6 Screw x 22
- M2*10 Screw x 6
- M2 Nut x 6
- DC005 Single Line x 1
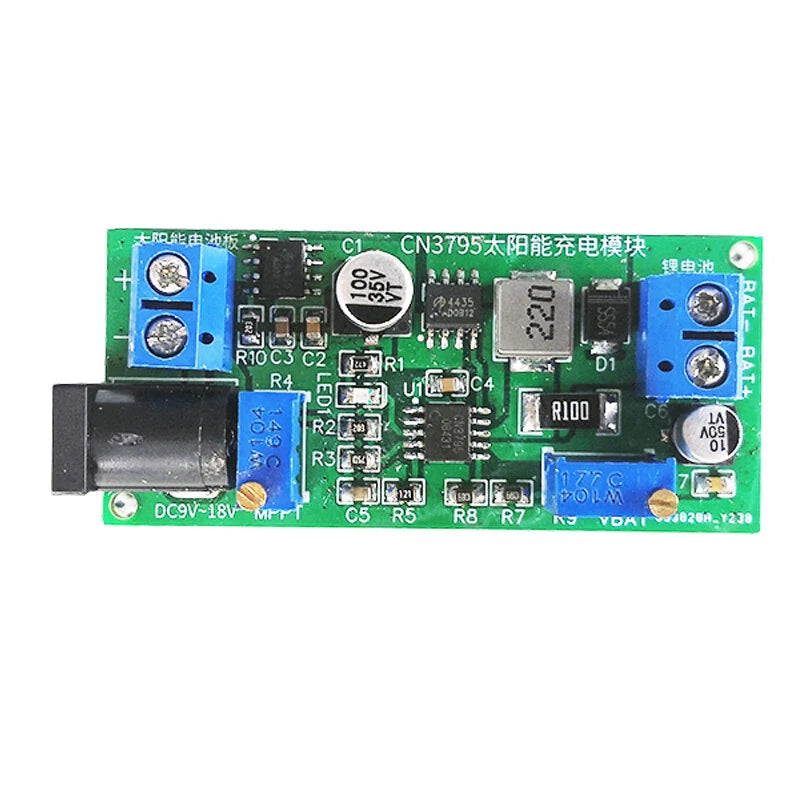
- CN3795 Solar Charging Module x 1
- Battery Box Module x 1
- Power Adapter 12V 1A x 1
- Use 14500 Lithium Battery 500mAh (not included) x 2
Debug Method:
-
Adjust the Output Voltage:
Connect the solar panel to the module to test output voltage. Adjust the VBAT potentiometer: turn clockwise to decrease and counterclockwise to increase. Ensure the output voltage matches the full charging voltage of the lithium battery pack. If there's no output, the solar panel's voltage might be lower than the MPPT setting voltage.
-
Adjust MPPT Voltage:
After adjusting output voltage, connect the lithium battery pack. There are two methods:
- If you know the best working voltage of the solar panels, calculate the set voltage by multiplying 0.85 with the operating voltage, then measure input voltage and adjust the MPPT potentiometer.
- If you don't know the best working voltage, use a multimeter on any pole to observe battery output and adjust the MPPT potentiometer until achieving the maximum current.
Note: The solar panel's optimal working voltage is temperature-sensitive. Ensure the panel is exposed to sunlight for a period during debugging. Keep lithium battery charge below 90% and above 0%.
Frequently Asked Questions:
Q1: Why does the panel move in a weak direction or behave abnormally in any direction?
Answer: Check if the optical module position matches the program or if the steering gear direction is set correctly. Modify the steering gear rotation in the program: for example, if 180°, adjust to 180° minus the angle.
Q2: The self-test is normal, but the panel does not move as expected.
Answer: Verify the wiring of the left and right light-sensitive modules. Ensure it follows: right side - upS, medium+, next- and left side - up-, downS. Wiring is not symmetrical, prioritize function over aesthetics.